Pages
A page is the canvas on which you draw your application. There are two types: the full screen page used to provide an overview of part or all of a system, and the pop-up page used to provide detail or control for some small part. There are no restrictions on the number of pages you may create.
Every VTScada application starts with a set of built-in pages. Most of these (the "system pages") cannot be edited. For example, the Alarm page, Reports page and Historical Data Viewer all exist to be used, but not changed.
You can edit or delete only a few of the built-in pages. Of note is the Overview page, which is a starter page to help you begin building your application. Three sample pages are also included, from which you may freely copy elements for use in your own user interface. Pages that you can create and change are referred to as "application pages".
The Page Menu page is a special case. You can (and will) edit the contents, but you cannot delete it, making it more of a system page.
Display scale issues
Please read, Size Pages for Differing Screens
There are several ways to create a page. The result will be the same, whichever method you choose. You can also import existing pages from another application but be aware that you may also need to import images or widgets that exist only in the other application, and that linked tags will not be imported with the page.
When creating a page, you will be asked for a title, and (with some methods) whether you want a standard page or a pop-up. Both can be changed later using the page properties ribbon.
- The Idea Studio must be open before you can create a page.

- If security is enabled, your account must have configuration privileges and the Page Add privilege.
When creating either a page or a widget, you will always be prompted for a title. A default value is provided, but you are advised to create a meaningful title for the page. It can be changed later, if required.
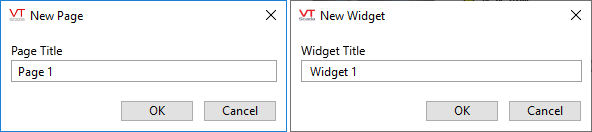
Prompting for a title - this dialog will be seen for every page and widget creation method.
Press Ctrl + N:
- In the Idea Studio, press the key combination Ctrl + N on the keyboard.
- Provide a title for the page in the dialog that opens.
- Click OK to save the title and close the dialog.
File Menu >> New
- In the Idea Studio window, click the "File" menu to open it.
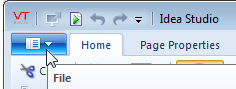
- Click on or hover over the option, "New" expanding the option list.
- Click either Page or Pop-up Page, depending on the type you wish to create.
- Provide a title for the page in the dialog that opens then click OK.
- Choose whether to include the page in the menu.
You can edit the menu later if you change your mind. - Click OK to save the title and close the dialog.
- In the Idea Studio, click the plus sign at the bottom of the editing window.
The New Tab dialog opens.

- Choose create a new standard or pop-up page.
- Provide a title for the page in the dialog that opens.
- Click OK to save the title and close the dialog.
Import an existing page
- In the Idea Studio, click the File menu to open it
- Click Import.
- Click Page.
- Use the Browse button to find and select the .SRC file of the page you want to import.
- Provide a title for the page in the dialog that opens.
- Click OK to save the title and close the dialog.
Clone an existing page
An application may require several very similar pages or widgets. Rather than create each from start to finish, it can be easier to copy or clone an existing instance and make a small number of changes.
- Open the page or widget in the Idea Studio and ensure that it is the selected item.
- Open the file menu.
- Click the command, Clone.
- Type a name for the new instance, then click OK.
The new instance will be created and opened for editing.
Alternate steps:
- Open the page or widget in the Idea Studio.
- Right-click on its tab at the bottom of the Idea Studio.
- Click the command, Clone.
- Type a name for the new instance, then click OK.
The new instance will be created and opened for editing.
