
Images provide visual context for a page. They may be maps, photographs or drawings of equipment, flow charts or anything else. A selection of photo-realistic background images of water, metal, stone, and more are available, as are lighting overlays. Note that these can be scaled or tiled to fill an area.
Images have no "Link" option to tie them to a tag. They are essentially static, although any property (movement, scaling, etc.) can be animated by linking it to a tag value or to an expression.
The Style Settings tag has no effect on images and should not be linked to any property.
* VTScada recognizes the following image formats: .BMP, .CUT, .PCX, .EMF, .WMF, .JPG, .PNG, .TIF
Add an image to a page: (Method 1)
- Open the Idea Studio and open the page where the image should be added.
- Open the Images palette.
- Click on a group to view the images within it.
If required, click the home button at the top of the folder list to return to the top level and select a different folder.
- Drag an image from the palette to your page.
- Adjust the size, location and other properties of the image as required.
Most tools are available through the image format ribbon.
Advanced configuration details are available by opening the Properties dialog of the image.
Add an image to a page: (Method 2)
- Open the page in the Idea Studio.
- Open Windows Explorer and find an image on your computer.
- Drag the image from Windows Explorer to the page in the Idea Studio.
The Imported Images folder of the Images palette will be revealed, and the image will be imported to your project and added to that folder. - Click OK in the New Menu Item dialog to accept the defaults. (Or, edit as needed before clicking OK.)
- Adjust the size, location and other properties of the image as required.
Troubleshooting:
- The image is too big / too small.
All images have an initial size, which may be wrong for your application. After the image is placed, zoom in or out on the canvas until you can see the edges easily, then select the image and drag the corner grips to resize it.
Select Image Dialog
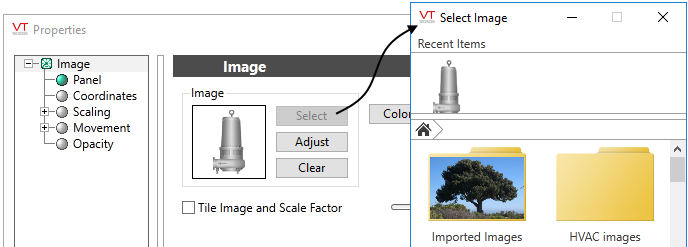
The Select Image dialog is used when changing an existing image.
Folders can be opened with a click. A click on an image will select it, completing the Select Image operation. New folders can be created, and new images imported using the buttons at the bottom of the Select Image dialog.
