Add Functions to Your Application's Library
The Function Selection Dialog, which helps you build expressions in tags and widgets, comes with several functions that are not part of the VTScada library. Advanced developers can create their own functions, which will then be available in the Function Selection dialog.
To write new functions, you will need an understanding of the VTScada scripting language that goes well beyond the expressions used in tags and widgets. You must know and understand features such as states, launched versus called modules, action triggers and more.
A poorly-crafted function, if it works at all, can consume excessive amounts of CPU and memory resources.
Preparation: Add an empty source file to your application.
Follow these steps to create a stub for your new function and declare it within the application. After successful completion of these steps you can focus your effort on writing your function.
The steps will vary depending on whether your application was created before or after the release of VTScada version 12.1. Newer applications will have a (FUNCTIONS) class within AppRoot.SRC. If working in an older application, you must add that class to your AppRoot.SRC file.
- Start your favorite text editor and create a new file.
- Add a comment line to the top of the file as follows:
{====================== NewFunctionName ================================}
- Save the file to your application folder, naming it whatever you want to call your function, with a ".SRC" extension.
(Optional: you might choose to create a subfolder, in which to store your functions. Not shown in this example.]) - Use your text editor to open the file, AppRoot.SRC, found within your application's folder structure.
- If the application was created using VTScada version 12.1 or later, locate the class section, [(FUNCTIONS)]
If the application was created before version 12.1, create the class section as shown in the following example. - Declare your new function within the (FUNCTIONS) class as per the following example.
If you saved your function within a subfolder, include that path with the file name.
[(FUNCTIONS)
  NewFunctionName   Module  "NewFunctionName.SRC";
]
- Save the file.
- Open the VTScada Application Manager and use the Import File Changes tool.
- Ensure that your source file is selected to be added.
If not, check that the file is not empty (this is why you added a comment) and that the file has the extension, ".SRC".
Write Your Function
For guidance on how to write clear and easy-to-maintain code, refer to the Style Guide for VTScada Code, provided within the documentation.
Step 1:
All VTScada modules should begin with a comment block that describes its purpose. You are strongly advised to add one, referring to the Style Guide for VTScada code.
Step 2:
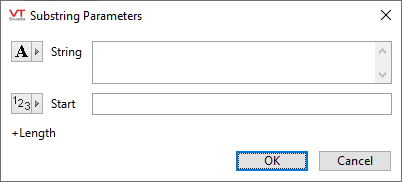
Declare any parameters that will be needed. You may attach metadata to each parameter to control how VTScada will prompt for it. For example, this prompt for Substring parameters asks for text, a number, and an optional numeric.
Metadata can contain any of the following keywords:
Units
Must be a phrase key such as "secondsUnitsLabel"
Qualifier
Only one qualifier is available: "Optional".
Type
Any of:
- Status (ie Boolean)
- Short
- Long
- Double
- Text
- Object
Subtype
Adds clarity to the type definition. For example, to provide a color, the type is text in the form, "<FFFFFFFF>". You would want to show the color picker tool rather than a text edit tool in this case, therefore you must specify that this text is a color using the subtype. Similarly for tags, you might specify the Type as "object", but to only allow Digitals (group) or font tags (tag type) these can be specified in the subtype. For a list of tag types, it is possible to specify an array here as well.
Specifying Subtype:Color for Type:Text and Subtype:TagType/TagTypes/Group for Type:Object are the the most common uses of subtype.
Example 1: Single keyword
Parm1 <:”Optional”:>Example 2: Multiple keywords must use JSON formatting
Parm1 <:"{""Units"":     ""secondsUnitsLabel"",
          ""Qualifier"": ""Optional"",
          ""Type"":      ""Object"",
          ""SubType"":   [""IO"", ""Drivers""]}":>
Step 3:
Declare any variables that will be needed. These will include the following required and optional declarations for user-defined functions.
❯ (Required) Add the following shared variable:
Shared FunctionLib(LIBRARIES);
❯ (Required) Use the Languages panel of the Application Configuration dialog to create a phrase for the function label, and copy the resulting phrase key. Use that phrase key to declare the label for your function as follows:
Constant DrawLabel = "CopiedPhraseKey";
❯ (Required) Declare and initialize the constant, FunctionUsage. This is a bitwise parameter that controls the whether your function appears in the function selector for a given context. (Script, steady state or tag configuration.) Being a bit-wise value, you may set any combination of bits in this constant.
- Bit 0 - Script
- Bit 1 - Steady State
- Bit 2 - Tag Context (tag properties dialogs)
Importing changes to functions that operate in script may have unexpected results, therefore an application restart is required. Steady state functions will update immediately, therefore functions defined with steady state usage and no script usage can be modified without requiring an application restart.
Constant FunctionUsage = 0b111 { Available in all contexts. };
❯ (Optional) To ensure that your function is included in the correct filter groups of the Function Selection dialog, add the relevant labels as follows:
{ Function keyword(s) }
[(1)
  TextLabel;
  MathLabel;
]
The existing labels for the filtering groups are as follows.
- AlarmLabel
- CountersLabel
- DateAndTimeLabel
- LogicalLabel
- MathLabel
- MouseLabel
- NetworkLabel
- TextLabel
- VariableLabel
You may add your own by creating phrases and using the phrase key within the preceding declaration.
Step 4 :
Write your function.
Your function must work equally well in both Script and Steady State.
Example Functions:
{============================ PercentDifference ==============================}
{ Returns the percent difference between two values                           }
{=============================================================================}
(
  Value1 Double               { First Value                                   };
  Value2 Double               { Second Value                                  };
)
[
   { Function Library required variables }
  Shared FunctionLib (LIBRARIES);
  Constant DrawLabel = "PercentDifferenceLabel";
   { Function Keyword(s) }
  [(1)
    MathLabel;
  ]
]

Main [
  Return(Abs(Value1 - Value2)/Value2);
]
{================================= ToggleVal =================================}
{ Returns a TRUE or FALSE toggling at a provided period                       }
{=============================================================================}
(
  Period <:"{""Units"": ""secondsUnitsLabel""}":> Double
                                    { period at which to toggle on/off        };
)
[
   { Function Library required variables }
  Shared FunctionLib (LIBRARIES);
  Constant DrawLabel = "ToggleValueLabel";
   { Function Keyword(s) }
  [(1)
    LogicalLabel;
  ]

  PROTECTED Value = FALSE;
]

Main [
  If AbsTime(TRUE, Period/2, 0);
  [
    Value = !Value;
  ]

  Return(Value);
]
