Display Building (Idea Studio)
Just getting started with VTScada? If you pressed F1 in response to the message on the initial Overview page, then here's what to do next:
You can clear the welcome message from the Overview page by pressing Ctrl + A (select all) then Delete. Then you will have a blank page, on which to begin development.
Steps in the development process follow, under the topic, "Organize your work".
Best practices for HMI design (Human Machine Interface)
Before creating the user interface for a SCADA system, it is worth learning the principles of HMI design. Several excellent resources can be found online and in textbooks. We encourage you to study the ISA 101.01 standard, which is available for purchase from the ISA online store. General information may be available through a web search.
A full discussion of HMI design is well outside the scope of these notes. Instead, our purpose is to show you the tools available within VTScada, leaving it to you to design the best HMI for your operation.
Display scale issues
Please read, Size Pages for Differing Screens
Organize your work
You can build the user interface before, during or after creating tags. (Most developers create tags first, then draw them.)
When building the user interface, the typical order of steps is to:
- Create and configure new pages. (See: Pages)
- Configure navigation to those pages. (See: Add Navigation)
- Draw widgets on the pages and link those widgets to tags. (See: Widgets for Tags)
- Enhance the display with images and decorations such as borders and frames. (See: Images, Decorations)
Idea Studio Components
The Idea Studio is where you create the user interface. It opens in its own window, so that you can edit pages while viewing them live in the operator display. There is no "save" button. Your changes are applied as you make them. (If your application runs on multiple workstations, you might choose to switch off auto-deployment while editing. Configuration Deployment)
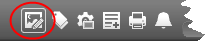
Open the Idea Studio by clicking the button shown circled.
You can make the Idea Studio open automatically when a user with configuration privileges signs in, by setting the application property
Often overlooked, this contains tools that you will want to use frequently. Note the many tools for customization.
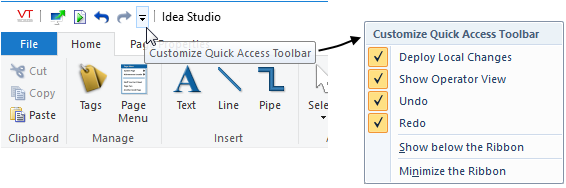
Customization options of the Quick Access toolbar
Standard tools in the Quick Access toolbar include:
- Deploy Local Changes - Enabled only when automatic deployment is switched off.
- Show Operator View - Close the Idea Studio and open the current page in the main window. Strongly recommended rather than simply minimizing the Idea Studio to view the page.
- Undo / Redo - Back up from design errors.
- Customization Menu - As shown in the image. Hide tools, change the location of the toolbar, minimize the main ribbon.
You can add any often-used tool to the Quick Access toolbar. To do so, right-click on any tool in any ribbon and select, Add to Quick Access Toolbar.
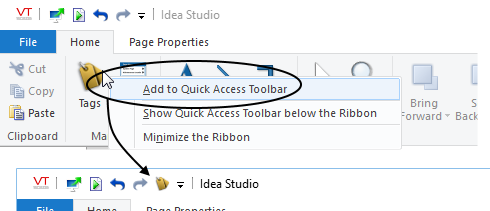
Adding the Tag Browser tool to the quick access toolbar
To remove a tool, right-click on its icon in the Quick Access toolbar and select "Remove from Quick Access Toolbar".
The ribbons
This is where you will find most (not all) of the tools in the Idea Studio. Ribbons are shown on an "as needed" basis, according to what is selected on screen. When more than one ribbon might apply (perhaps you have selected both text and an image), you will find tabs across the top of the Idea Studio that can be used to switch from one ribbon to another. In all cases, the Home ribbon will be available.
Reference: RibbonsIdea Studio Ribbons
Labeled with the word File, or with only an icon, depending on the version of the Windows® operating system that is installed on your computer.
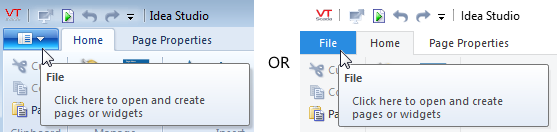
Opening the file menu
Tools in this menu allow you to:
- Create new or existing pages and widgets.
- Close the open page or widget.
- Clone the current page or widget, creating an identical copy.
- Import a page or widget by selecting its source code file.
- Delete a page or widget.
- Open the Application Configuration dialog
- Open this Help file.
Note that most File Menu tools can also be found by left-clicking the plus sign or right-clicking a page label in the Idea Studio navigation bar:

Shortcut to file management tools for a page.
Splitter bars
Divide the palette (on the left) and the panels (on the right) from the drawing area of the Idea Studio.
Double-click either bar to open and close or drag left and right as needed. Both bars will always be visible but may be mistaken for the edge of the window.
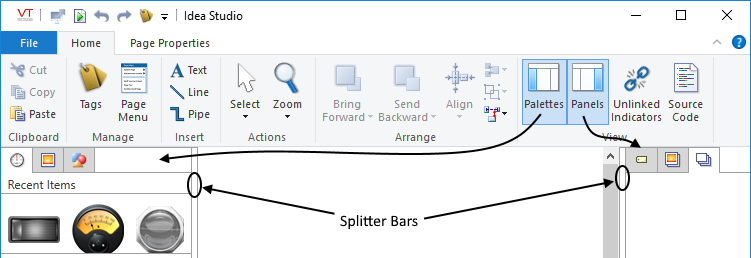
The Idea Studio, elements and home ribbon.
Icons replace labels in this compressed view.
Covering the left side of the Idea Studio, the three palettes are where you will find all widgets, images and shapes to add to your pages. Palettes are organized into folders and for the widgets palette at least, you will find the same items in several folders for ease of searching.
The palette is a window that can be closed, opened and resized. Use the scale slider at the bottom of the palette to resize the contents but note that labels are not shown when the icons are much smaller than the default size.
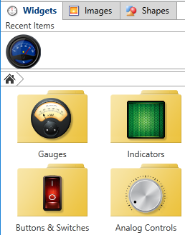
Palette detail, widget palette open
Palettes include:
- Tabs for switching between the three palettes.
- A Recent Items list, with a separate list for each palette.
- A navigation bar to help you keep track of which folder you are viewing within a palette.
- The tools and folders that make up each palette.
- Widgets for Tags
- Images
- Shapes, Pipes, Lines
Palette entries are built using Menu Item tags, which means that you can reorganize them to suit your needs. Do so either within the Menus section of the Tag Browser, or by right-clicking directly within a palette, then using the pop-up menu (recommended).
Remember that you can search for tags by name, or by all information. That fact applies to Menu Item tags as well. But, you must be working in the Tag Browser to do so.
Many developers like to create a folder of frequently used widgets or images to save time from searching.
There are three tabs within the panels window. The panels window will open automatically to the Multi-Image Widgets tab or the Layers tab when relevant to what you are doing within the Idea Studio. The Tag Links panel must be opened as needed. Many developers choose to leave the panels window open but reduced in size from the default while they work on a page or widget.
Navigation buttons and zoom controls
Across the bottom of the Idea Studio, all the currently open pages and widgets will be listed. You can click any page or widget's tab to open it for editing. You can click the (+) sign to the right of the tabs either to open a currently closed page or widget or to create a new one. You can also right-click a tab to open a menu of file-commands for that page or widget.
Display controls are provided in the bottom bar of the Idea Studio. You can change the display scale to 'zoom-in', the better to see detail in your work. You can also change the display scale of the palettes to see which tool you are choosing or to see more tools at a smaller scale. The three sets of coordinates in this toolbar show the top-left corner location of selected objects, the overall size of the selection and size of the page.
To pan, use the scroll bars across the bottom and the right side of the Idea Studio.

Detail from the Idea Studio navigation bar
Keyboard shortcuts for the Idea Studio
A limited number of keyboard shortcuts are available for use within the Idea Studio. Most are standard for Windows programs.
<CTRL>N Creates a new standard page <CTRL>O Opens an existing page or widget <CTRL>C Copies the selected graphics <CTRL>X Cuts the selected graphics <CTRL>V Pastes the graphics from the clipboard
The new graphic will be placed wherever the cursor is currently located.<CTRL>B Turns the selected text Bold <CTRL>I Turns the selected text Italic <CTRL>U Turns the selected text Underlined <CTRL>Z Undo last action. May be used more than once. <CTRL>Y Redo last undone action. May be used more than once. <DEL> Deletes selected graphic
